Building a Backyard Observatory on a Budget
Welcome to our guide on building a backyard observatory on a budget.
A backyard observatory is a permanent shelter that protects your telescope and lets you start observing in minutes rather than hauling equipment outside each night. It’s similar to those fancy white domes at professional observatories, just scaled down for your backyard.
Without a dedicated setup, you’d need to carry your telescope in and out every time you want to stargaze can quickly become tiring. With a backyard observatory in place, you can just walk outside, open the roof, and be ready to explore the night sky.
In this article, we’ll show you how to build one on a tight budget and which materials you need. You’ll also learn the three main observatory types and realistic budget ranges to expect.
Let’s start with the basics.
What Types of Backyard Observatories Can You Build?
You can build three main types of observatories: roll-off roof sheds, clamshell designs, and rotating domes. Each one suits different budgets and skill levels. And among these, the roll-off roof is the most popular choice for backyard astronomy enthusiasts.
Take a look at each one to find your best match.
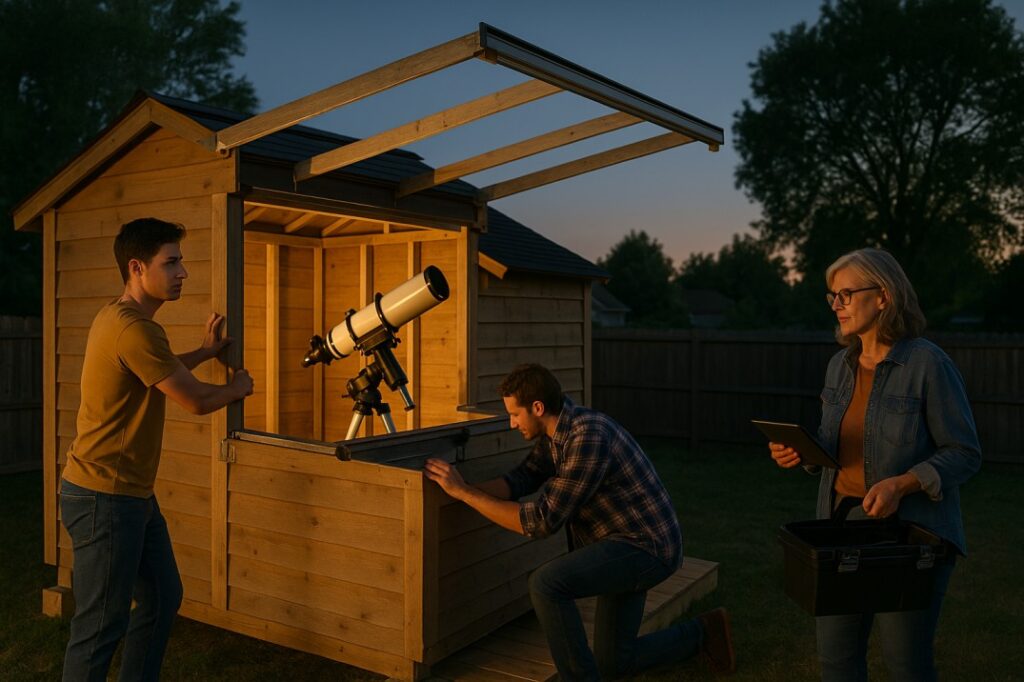
Roll-off Roof Observatory
The design is straightforward. Picture a shed where the roof sits on wheels or rails and slides backward, so your telescope gets an unobstructed view of the night sky.
This design is the cheapest option for beginners with basic tools and limited construction knowledge. You don’t need fancy carpentry skills or power tools to build one. In fact, most people finish theirs in a weekend using lumber from the hardware store.
Now, when you’re done observing, simply slide the roof back, and your equipment stays protected from weather and critters.
Clamshell or Flip-top Design
If you’re short on space, consider the clamshell design. The setup includes two roof panels that hinge open like a clamshell to expose the telescope underneath. This design works great for small backyards where ground-level space is tight.
Even better, the roof panels are built using lightweight materials like corrugated plastic over a wooden frame. This material choice keeps costs low and makes the setup simple enough for one person to handle. Plus, some builders finish these DIY projects in just three days using salvaged materials.
Dome Observatory
A round dome rotates with a slit opening that follows your telescope mount across the sky. It’s the same design you see at professional observatories.
Beyond looks, domes offer the best wind protection, so you can observe indoors during cold weather or when conditions get rough. Also, the rotating design blocks stray light from streetlights better than other types.
The downside? Domes are more expensive and complex to build. But they look top-notch and handle strong winds better than roll-off or clamshell designs.
How Much Does a Backyard Observatory Cost?
A backyard observatory can cost anywhere from $200 to $3,000, depending on your design and materials. Believe it or not, some backyard astronomy enthusiasts have built working setups using just hardware store bargains and salvaged lumber. So you don’t need a huge budget to start observing the night sky from home.

Here are three budget-friendly approaches.
Ultra-budget Build Under $500
Use salvaged materials like pallets and leftover lumber to keep costs minimal. Even with salvaging, you’ll spend most on corrugated roofing, recycled wood, and basic hardware.
To be specific, your shopping list includes roof panels, 2×4 studs, garage door wheels, and simple track materials. And you can grab everything in one hardware store run and fit it all in a pickup truck.
This ultra-budget approach works well for testing a permanent telescope setup before you commit to spending more money.
Mid-range Prefab Conversion $800-1500
The easiest mid-range option is converting a 6×6 or 8×8 plastic garden shed into a roll-off roof observatory. These sheds eliminate wood rot issues and need less maintenance over time in the rain and weather.
For the roof mechanism, however, a DIY rail system using garage door wheels and U-channel track creates smooth roof operation. In terms of longevity, the plastic construction handles moisture better than wood and won’t warp or crack.
Premium DIY Build $2000-3000
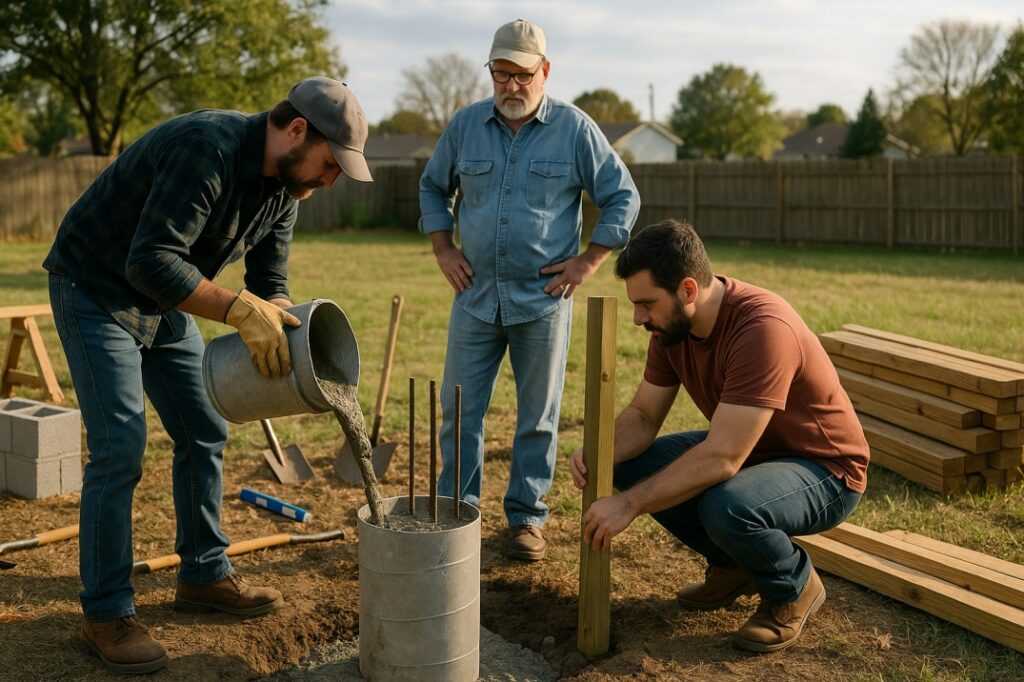
At this price point, you’re building for the long haul. A custom wooden structure gives you full control over size and features. Since you’re building from scratch, use pressure-treated lumber and quality hardware throughout for a build that lasts decades. After that, the main detail to sort out is the foundation.
The big expense here is the concrete pier foundation isolated from the main building floor. This isolation prevents vibrations when you walk around the interior during long observation sessions.
That way, you can match the layout to your mount and add automation features whenever it makes sense.
What Materials Do You Need for a Budget Observatory?
You need three main categories of materials: foundation and pier materials, structure and walls, and roof with weatherproofing. Out of all three, the foundation carries the highest expense but provides stability.
We’ll break it down category by category.
Foundation and Pier Materials
Concrete bags and rebar create the isolated telescope pier at ground level. You’ll pour this separately from the main building to prevent vibrations.
As for the observatory walls, cinder blocks or pressure-treated posts set in gravel form your building base. These materials keep the floor elevated above ground moisture.
Once the pier cures, steel pipes secure your telescope mount to the concrete pier. In turn, this setup prevents movement issues during long observation sessions.
Structure and Walls
Pressure-treated 2×4 studs frame your walls to handle extreme conditions, unlike regular lumber that rots quickly in outdoor weather.
Building on that base, cover the frame with OSB or plywood sheets for rigid wall support and room structure. Then apply dark paint to reduce interior lighting reflections when observing the night sky.
Roof and Weatherproofing
Corrugated plastic or metal roofing panels are lightweight and handle wind well. So before buying them, check your local weather conditions, especially if your area gets strong winds or heavy rain.
Your roof also needs hardware to slide back and forth, which means garage door wheels and U-channel track for smooth roll-off functionality. Plus, silicone sealant and weatherstripping keep rain and critters out for good.
With these basics covered, your observatory stays dry and functional year-round.
Is Building a Backyard Observatory Worth It?
Setting up your telescope every night gets old fast. That’s why most amateur astronomers give up on regular observing because the hassle outweighs the excitement. A backyard observatory solves that problem by keeping your gear ready and protected year-round.
We’ve covered three observatory types, a budget ranging from $200 to $3,000, and the essential materials you need. You’ve also seen how roll-off roofs offer simplicity, clamshells save space, and domes provide premium protection. Now choose based on your budget and backyard size.
Ready to start your build? Check out more stargazing tips and astrophotography guides on Star Hawks Blog. Your night sky adventures are waiting.